Have you ever wanted to have a private lesson with your favorite musician? Of course, you have! Musicians of every kind have unique skills you can learn and use. Sadly, the chances of meeting your favorites are slim, making a private lesson is out of the question.
Right?
Actually, not quite! While a private lesson would undoubtedly be fantastic, that’s not the only way you can learn from them. In fact, you could learn from them right now, without even buying sheet music!
“Transcription” refers to the practice of listening to music and writing down the notes you hear. It requires a trained musical ear that can pick apart melodies, timbres, and layers of music.
Musicians of all types of genres have learned how to play by transcribing their favorite artists. In fact, the entire style of jazz was built on transcribing.
Thankfully, transcription is not as hard as you might think. It is hard work. It does require patience and dedication. But trust me, the results are well worth it!
Table of Contents
- Confronting the “Transcription Boogieman”
- First Steps: Getting Set Up
- Transcribing the First Section
- Completing the Other Sections
- Finishing Up!
- Several More Transcribing Tips!
- Tip 1: Note the Timestamp at the Start of Each Line
- Tip 2: You Don’t Have to Notate Everything, All the Time
- Tip 3: If The Song is Off Tune, All Is Not Lost …
- Tip 4: Listen to Your Song with Different Speakers
- Tip 5: If You’re Trying to Write a Melody Before You Forget it, Drop Note Stems!
- Tip 6: If You’re Trying to Figure Out a Melody in Real Time, Use Solfege on Scrap Paper!
- Tip 7: To Transpose or Not …
- Tip 8: Learn Drum Notation!
- Tip 9: You Don’t Have to Transcribe the Vocals
- Conclusion
Confronting the “Transcription Boogieman”
![]()
If you already know about transcribing but haven’t seriously done it, then you are probably sitting in one of two camps.
First, you might not have formal musical training. Writing down music seems intimidating, or you might not even know how to read it.
If this describes you, then I’ll be straightforward with you; learning to read music will take some time to learn, and may be confusing at first. However, it is well worth the effort. It’s beyond the scope of this article, but any savvy Internaut can learn it in a matter of hours.
The second camp are those musicians who only read music. If this describes you, then you might be scared to “play by ear.” Well, there is good news: your listening skills can only get better, and why not start now?
The truth is that everyone can benefit from reading music. Reading music allows you to jot down musical ideas in an intelligible way. It also allows you to communicate your ideas with a band. It also helps you remember ideas for later, whether for reference or performance.
At the same time, it’s worth mentioning that reading music isn’t essential for playing music. In fact, written music only accounts for a small amount of music in our world. At the end of the day, written music is just a tool to create great music. After all, music is something you listen to, right?
Back in college, I belonged to the second camp. I was classically trained and relied entirely on written music. At the same time, I listened to a wide array of music – everything from funk and jazz to sixties rock and Irish folk.
I found lots of guitar tabs and piano arrangements for my favorite pop tunes, but none of them made me happy. Why? Because they were often simplistic or even flat-out wrong.
Most importantly, they were arrangements, not the notes in the actual recording. If I wanted sheet music for Simon & Garfunkel’s “Bridge Over Troubled Water,” I wanted the full chords Larry Knechtel was playing on piano – not just left-hand triads under a right-hand melody.
This frustration led me to transcribing. I wanted to get inside the musicians’ heads. When I heard a record, I didn’t want the basic melody and chords; I could find those on Google.
Instead, I wanted the unique licks and techniques that made that recording special. Most of my transcriptions were a necessity, simply because I couldn’t find any resources online.
I wasn’t a gifted jazz musician and don’t have a stellar ear. I was a classical musician used to reading “musical instructions.” But I was tired of that. I wanted a written reference for the things I learned, but wanted to rely on my ear at the end of the day.
Writing my own transcriptions let me do that. Writing my own transcriptions allowed me to use my classical training to build a treasure trove of transcriptions I can refer to later. Yet it fostered my skills as a popular musician and composer, forcing me to truly listen to music and live it in the moment.
Alright, enough talk: let’s get started!
First Steps: Getting Set Up
Many things happen before you start transcribing. Some of them help you get organized, while others develop your listening strategy. Both are crucial for getting the most out of your transcription.
Step one is simple: you need blank sheet music!
You can find all sorts of journals and PDFs out there, but my favorite comes from MusicaNeo. This site sells sheet music, but it provides blank PDF templates for free!

They have many templates, but I use the one with 20 empty staves. This allows me the most flexibility to arrange everything how I want.
Next, we need to come up with a game plan for listening. While it may take some time, this step is crucial, and usually quite simple. Plus, it’s really fun!
When I approach a new song, the first thing I do is ask myself, “What do I want to learn from this song?” Sometimes it’s very specific, like learning some groovy Hammond licks. Other times it’s pretty general, like wanting to learn all the parts for a live cover.
Next, I try to come up with a list of all the featured instruments (unless you only care about one). Often, you’ll be surprised at the nuances you don’t hear with casual listening. For example, did you know there’s a mandolin in Billy Joel’s “Piano Man,” and an organ in Radiohead’s “No Surprises”?
![]()
This process will give insight into how the song is arranged, and how its ideas are developed. It also helps you find which instrument to focus on first. Usually guitar and piano take the lead, but that’s not always the case.
After this, I look up as many chord charts and written arrangements as I can.
Now I know you might be thinking, “HYPOCRITE!” But I have a solid reason for doing this: while they might be incomplete or simplistic, they still give me a basic outline of how a song is arranged.
While you don’t want to rely on them exclusively, they are great tools to understand song structure. In the transcribing game, anything that helps is welcome, even if it seems like “cheating.”
Chord changes are crucial to both harmony and timing. They clue you into which notes are being played at any given time, which helps with melodies. They also help you know when melodies and sections might change, depending on how many beats each chord lasts.
Guitar chord charts are great for this, even if your song doesn’t use guitar. Just be aware, you might need to listen to the song several times to figure out where the chord changes are. Guitar charts are incomplete by nature, which is fine – it’s your job to fill in the details.
As for arrangements, most often they’ll just be the main melody. While basic, this gives you a head start. In other cases, well-done arrangements can even give you clues for countermelodies and licks.
Once I have a list of instruments and chord changes, I will break the song down into sections and neatly arrange them on paper. Discovering the form of a song is the best way to make a complicated task a manageable one.
An Example of How I Get Set Up
Here’s a practical example of how I get set up: first, I’ll figure out the time signature and write that first.
Then I’ll allot a line to each instrument in the first section, also making note of when certain instruments come in and out. Finally, I’ll write the chord changes above each measure.
The first tune I ever transcribed was Simon & Garfunkel’s “America.” I knew it was in ¾ time and used two voices, two guitars, organ, bass, and drums. After listening to the first 30 seconds, I knew the intro was 16 measures, and used everything but bass and drums.
I allotted lines to Paul’s voice, Art’s voice, organ, and “2nd guitar” (1st guitar strums, so I didn’t bother to write it). Then I labeled the intro.
Next, I divided those lines into 8 measures and copied them into the next four lines. After that, I wrote the chord names above each measure to guide my ear.
![]()
For some reason, I find these steps super relaxing! Not only does blank music give you a staff to write on, but it gives you a way to spatially organize what you’re hearing.
Even before you write down a note, you can still use blank music to map out what you’re about to hear. Think of it as a painter’s blank canvas. With spaces allotted for every aspect of the song, you can fill in sections as you figure them out – even if you don’t get them chronologically.
Now that we’ve got the game plan organized, chords and melodies to work with, and a page to fill up, we’re ready to begin the actual transcribing process!
Transcribing the First Section
![]()
Now comes the fun part: find your best pair of headphones and CRANK that music up! You’re studying this music now, just like an English major bent over Shakespeare’s sonnets. You want to make sure you can hear everything.
Next, I highly recommend having a piano nearby. You can use any instrument to check yourself, but I think the piano’s layout lends itself naturally to figuring out tunes by ear.
As for the actual transcribing process, it’s something you’ll just have to practice and get used to.
First, focus entirely on one instrument of one section before moving on. Once that’s done, I’ll go back and start the same section on another instrument.
I’ll warm up by listening to several measures at a time to get a “big picture” of how everything works together. Then I’ll go back and listen to whatever I’m comfortable remembering. With some songs, I can write down 5 full seconds on one listen. Others, I can hardly write down 1 second!
Whatever your skill level, understand that there’s no problem with going slow, second-by-second. It’s all about quality, not speed or quantity. Some of my transcriptions are only half a page!
The majority of your transcribing process will look like this: cranking the music up, listening to 3 seconds again and again, writing and erasing a lot, constantly humming, and punching notes on the piano every few seconds. You’ll look crazy … but that’s alright!
Because transcribing is so fragmented and detail-oriented, I almost always use YouTube for playback. I’ll use the spacebar to pause whenever I need and use the forward and back arrows aggressively to play and replay what I need. This “analog” connection is much faster and more accurate than sliding across a touch screen, or blindly stabbing the screen while you’re focused on your paper.
Some people use slow playback for difficult passages. I use it when nothing else works. Honestly, though, the glitching sound can add another layer of confusion. I’m mentioning it because it’s a useful tool, but I wouldn’t rely on it too heavily.
Once you’ve written down all the instruments for an entire section, you’re ready to start the next one! I cross out the blank line underneath that section with big fat ugly lines, then start the next section on the line below. That way, it’s easy to visually distinguish between sections.
But before you actually move on, here’s a helpful tip: take a break! 😀
Transcribing is hard work, and most of the time you don’t want to do it all in one sitting 😉
Completing the Other Sections
You will follow the same steps for every new section. As you start each section, think about why it’s unique from the others.
Often, the melody will be completely different – that’s obvious. But if you listen closely, there’s almost always something that’s changed in the background. Guitar strumming might change, or arpeggio patterns might get switched up. Other times, new instruments will join.
At the end of the day, your ear is the final judge. If you can’t figure out what you’re hearing, figure something else out before coming back to it; the more information you write on the page, the more prompting your hearing will get. You can always come back with new insight.
I try not to write something down until I’m absolutely sure it’s right; however, if it’s really bothering me, I’ll write something just to fill the space. I’ll make a note and come back. Psychologically, just seeing something written down gives you more confidence.
Finishing Up!
Once you’ve completed the entire transcription, you get to the most fun part of the journey: listening to the entire song and checking your work!
Okay, okay … sometimes it’s stressful. But overall, checking your work is a very rewarding experience. Just go instrument by instrument, pausing, checking, and tweaking as needed.
Also, don’t bother inputting your work into music notation software. You never know if you’ll want to change it later, and you want to keep your transcription as tweakable as possible.
Once that’s done, then congratulations, you’ve transcribed your first song!! Now go get a camera and a band and get a jam session going! 🙂

But of course, if you’re just reading this, you haven’t actually gone and started transcribing yet, which is all fine and dandy!
Below, I’ve written several more tips that can help your transcribing process go smoother. Feel free to use whatever ones you want, and ignore the ones that don’t. As the saying goes, “If it ain’t broke, don’t fix it!” 🙂
Several More Transcribing Tips!
Tip 1: Note the Timestamp at the Start of Each Line
![]()
This tip is so easy, but so useful! There’s nothing more annoying than skipping around in a track, trying to find where you just were.
I always make it a habit to mark the minute and second each line starts with. That way, I know precisely where I should go back to. Simple, but essential!
Tip 2: You Don’t Have to Notate Everything, All the Time
A lot of popular music is repetitive, and that’s totally fine! That doesn’t make it any less great.
Fortunately for you, that also means you don’t have to rewrite every single note if a measure repeats multiple times. If you’ve ever read jazz sheets, you may recognize the “repeat measure” symbol. Feel free to use it!
In the same vein, feel free to use a lot of jazz notation; jazz arrangers like shorthand, not explicit notes.
Also, as you transcribe more and more, don’t feel like every line has to have the time signature written down etc. I’ll write all those details in the first few lines, then just drop them for the rest of the transcription. Reserve your energy!
Tip 3: If The Song is Off Tune, All Is Not Lost …
After trying to transcribe for a while, you might notice something strange; not every recording is perfectly in tune! There are lots of reasons for this, and it doesn’t mean your favorite artist was tone deaf.
If you’re using a piano, as I suggested earlier, this poses a problem. Sometimes, you can just deal with the slight “off-ness,” while other times it’s unbearable.
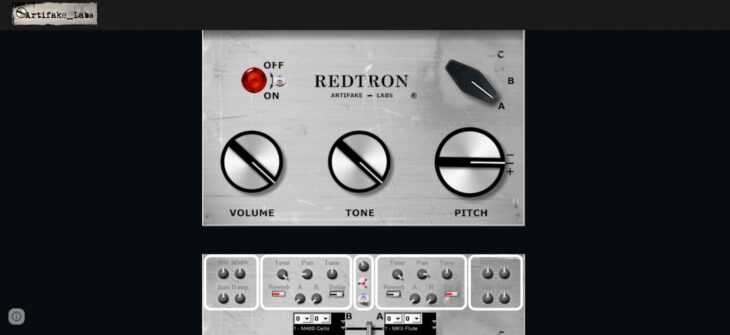
If you can’t stand it, you can use any keyboard VST in your DAW that allows for retuning. I will plug my MIDI keyboard into my computer and retune my VST plugin until it matches the recording.
If you can’t find a VST that allows detuning in itself, most DAWs have built-in tuning effects. Unfortunately, they can cause a lag with sound, but it’ll still work in a pinch.
Personally, I use Redtron MKV, by Artifakes. It’s a mellotron emulator, not piano – but hey, it’s free and I’m not picky!
If you’re good at guitar, you can also retune your guitar!
Tip 4: Listen to Your Song with Different Speakers
You won’t believe how many times I’ve been driving in my ancient van, using tinny old Bluetooth speakers, when I hear something totally new in a song.
This is another simple tip, but can be quite effective. Different speakers, no matter how cheap, accent different frequencies and instruments. Even if they don’t provide the best listening experience for quality, they often accent things you can’t hear on top-notch gear.
Tip 5: If You’re Trying to Write a Melody Before You Forget it, Drop Note Stems!
![]()
This one’s easy – if your pencil is going up in flames because you’re writing notes super-fast, don’t worry about writing their stems. Just write the note heads. You can always go back and fill in the stems and flags.
Tip 6: If You’re Trying to Figure Out a Melody in Real Time, Use Solfege on Scrap Paper!
![]()
Similar to tip 5, maybe you’re trying to figure out a melody, but aren’t sure if it’s correct. Because of that, you don’t want to write the notes on the staff quite yet.
In this case, I’ll usually write what I hear in solfege, and I’ll put it in the margins. I’ll tack on some quarter and eighth notes above them for good measure. Personally, I find this “shorthand” method a fast and effective way of wrestling with melodies in the moment.
Tip 7: To Transpose or Not …
![]()
If you play guitar or certain wind instruments, you may find key discrepancies with the notes you play on the piano.
For example, say you’re playing guitar using C shapes, but the capo is on the fourth fret. You will be playing C shapes, G shapes, etc., but the tune will really be in E, using E chords, B chords, etc. Confusing, right?
So … for the chord chart, which key/chords should you use? Simply put, use whatever you think is best for you. Both can be useful in different situations.
If I’m trying to figure out all the instruments, I’ll base it all around the piano. I can always make a note about capos for the guitar sections, then put the “chord-shape chord” in parentheses above it.
But if I’m only transcribing the guitar, then who cares? I’ll just use whatever chords I’m actually fingering, and save myself the extra work.
Tip 8: Learn Drum Notation!
![]()
This could require an article in itself, so I won’t go into detail. Let it suffice to say that learning basic drum notation can be very helpful for establishing and understanding grooves.
Luckily for you, if you don’t know drum notation, you can usually save drum transcribing for last!
Tip 9: You Don’t Have to Transcribe the Vocals
Since the vocals are usually the most recognizable part of a song, I’ll usually just leave them out.
If I need lyrics to know where I am in the song, I’ll just write them under the lead instrument. Most of the time I’ll just write the first few words of the sentence – just enough to let myself know where I am in the lyrics.
Conclusion
Transcribing is a fantastic way to learn new music, discover new techniques, and get inside the heads of your favorite artists. Furthermore, it develops your aural skills and general listening.
I’ll end my article by stressing what I said before; fundamentally, transcribing should be used as a tool to internalize the music you love. You shouldn’t stay glued to it when performing.
Rather, you should try and memorize the tune and use what you’ve learned to develop your music. It should help music flow from you – after all, you’re the one making the music happen!
If you’re disciplined, you’ll soon find yourself with a huge, personalized collection of excellent tips and tricks to learn from. Since I’ve started, I have notes on everything from the Beatles and Radiohead, to Irish accordion jigs and Minimoog solos.
So, in several months … what tunes will you have?
Happy transcribing!